

 english
 עברית
עברית русский
 français
 español
 deutsch
 český
český ελληνικά
 italiano
 日本語
日本語 nederlands
 polski
 português
 svenska
 turkish
 中文
中文 हिंदी
हिंदीss
How to upload photos to your albums
1. Login into your account and select “Upload Photos” page via “Media” menu.
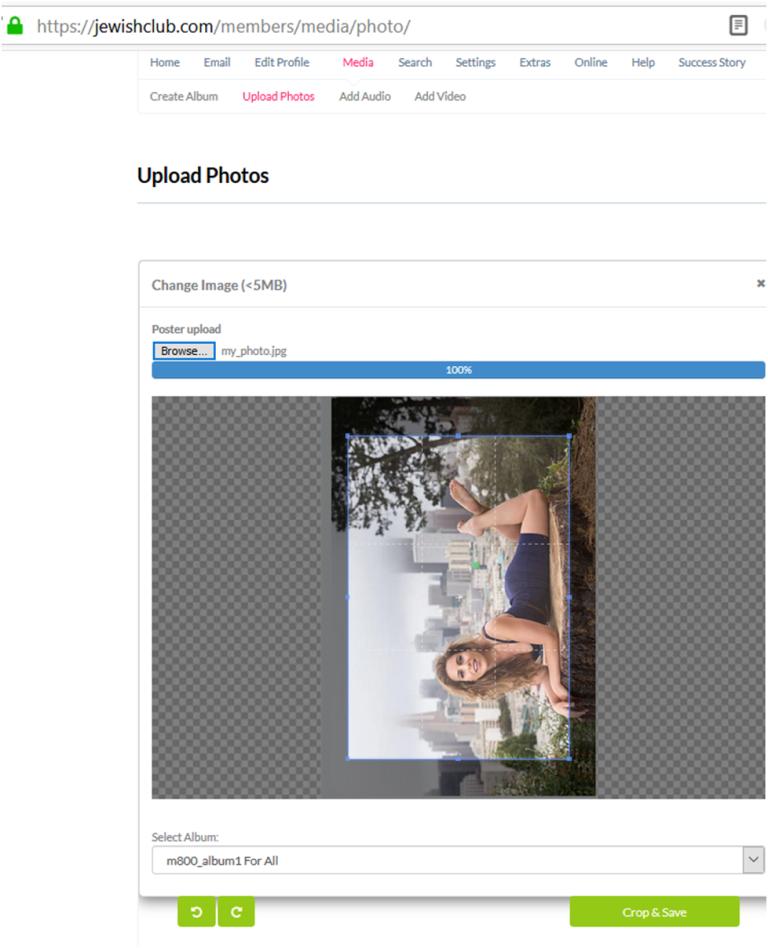
2. Click “Change image” button.
3. Click “Browse” button and select your photo (“jpg” format only) on your local PC. Once you click it uploading process will be started automatically. You need to wait until your photo upload is complete.
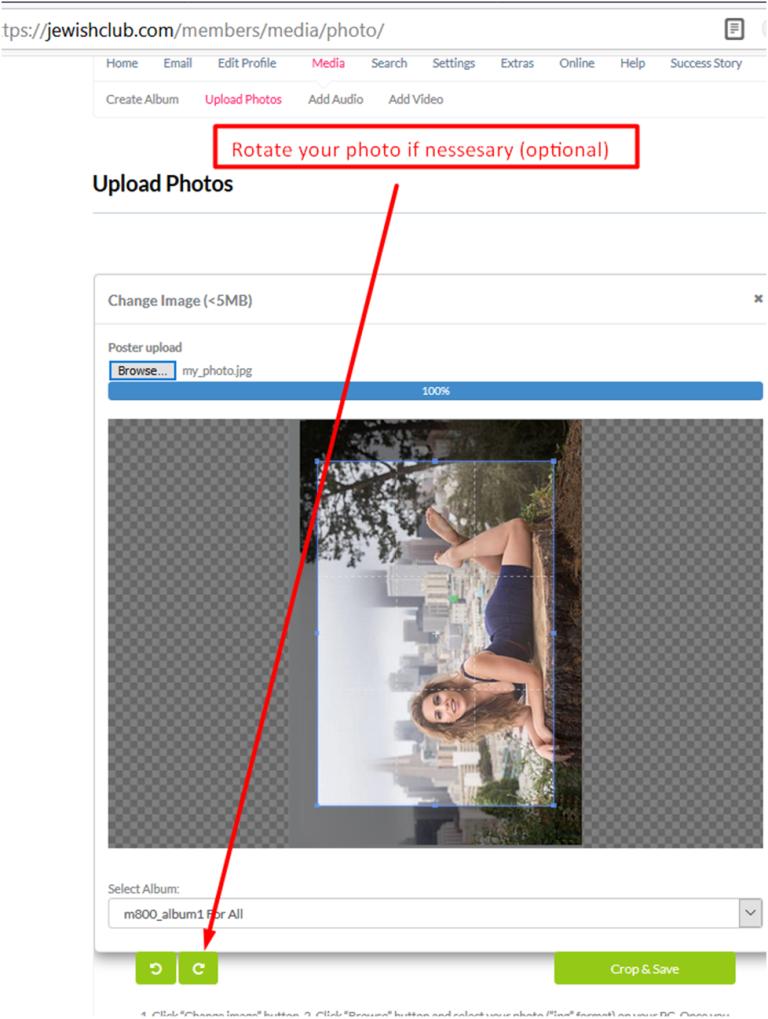
4. Rotate your photo by clicking “rotate button” if necessary (optional).
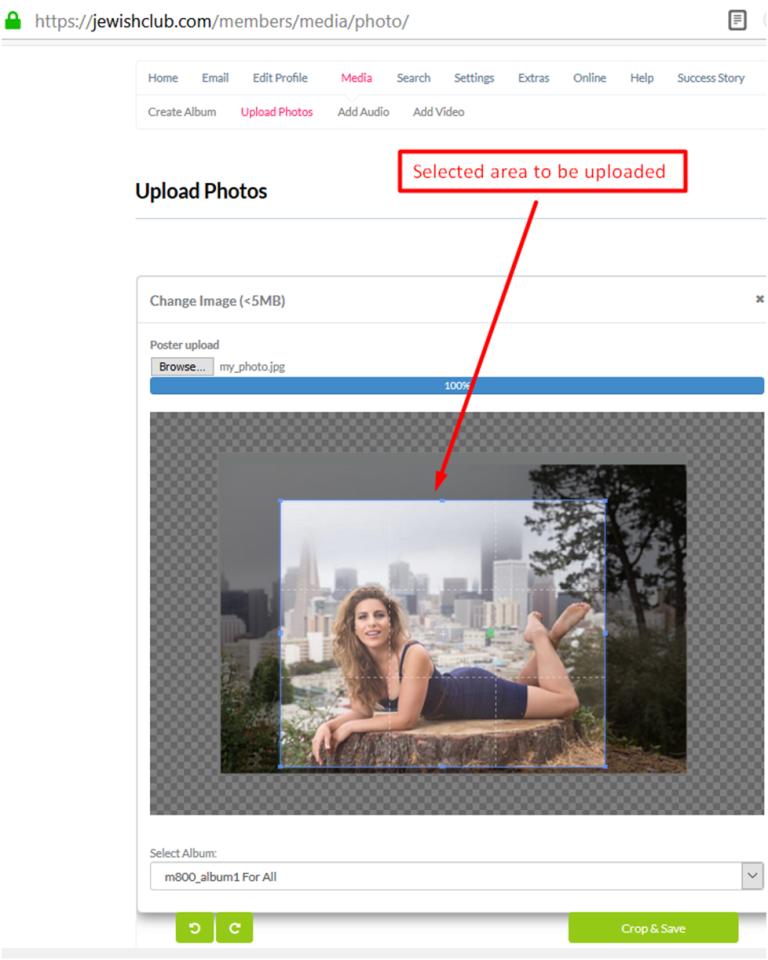
5. Pull and stretch selected area you want to upload if necessary (optional).
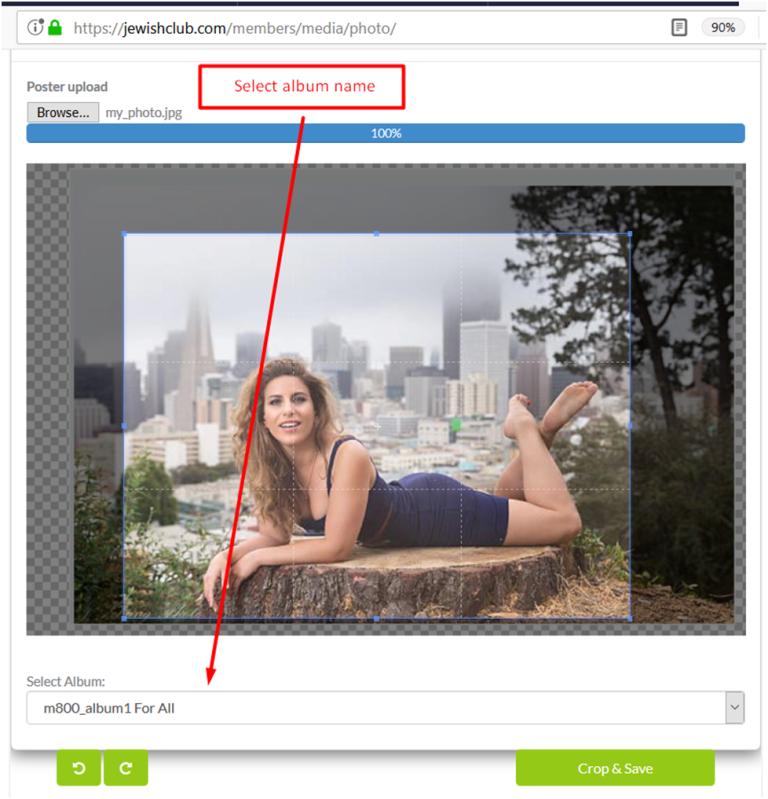
6. Select album name album you want to upload your photo to. If you have not previously created any album, then your photo will be uploaded to the automatically created album, available for all registered users (members) and guests of the site. After that click “Crop & Done” button. Please take into account that you can create albums via “Create Album” page with the following options for displaying photos uploaded into them: “All” – an album for photos that will be available to all registered users (members) and visitors of the site, “Registered users” – an album for photos that will be available only to registered users (members) of the site, “Friend “- an album for photos that will be available only to your friends, “Private”- an album for photos that will be available only to members you added to your favorites.
7. Please feel free to send us your photos by email: support@jewishclub.com and we will upload them for you within 1 business day if you experience any difficulties to upload them yourself.